VS Code Server

VS Code Server
- Version: 4.19.1
- OS: Ubuntu 22.04 (LTS)
- Category: Developer Tools
Description
VS Code Server (code-server) lets you run Visual Studio Code as a web application, giving you a full cloud-based integrated development environment accessible from any browser. You can write, edit, and debug code from any device without installing anything locally. It supports the full extension marketplace, integrated terminal, Git integration, and all the customization options you expect from VS Code — served securely from your own EasyCloudify VPS.
Software Included
| Package | Version | License |
|---|---|---|
| code-server | 4.19.1 | MIT |
| Nginx | 1.18 | Custom |
| Certbot | 1.21.0 | Apache 2.0 |
Key Features
- Web-based Visual Studio Code accessible from any browser
- Full extension marketplace support
- Integrated terminal with access to your VPS shell
- Remote development from any device or location
- SSL encryption and password-protected access
- Nginx reverse proxy pre-configured
- Real-time collaboration via shared workspace links
Getting Started
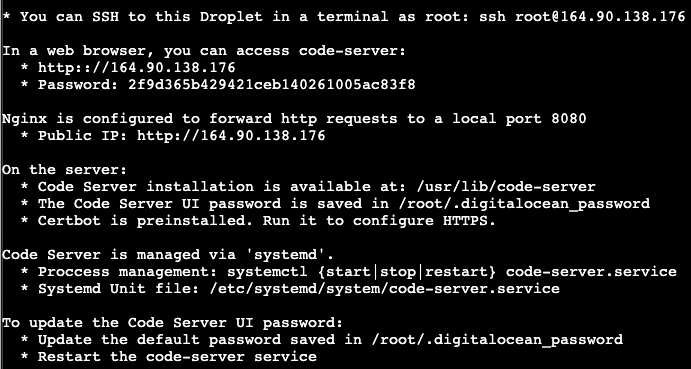
1. Connect to Your VPS
After deploying this app, open a terminal and SSH into your VPS:
bashssh root@your-vps-ip
The login banner will display the code-server password and the URL to access the interface.
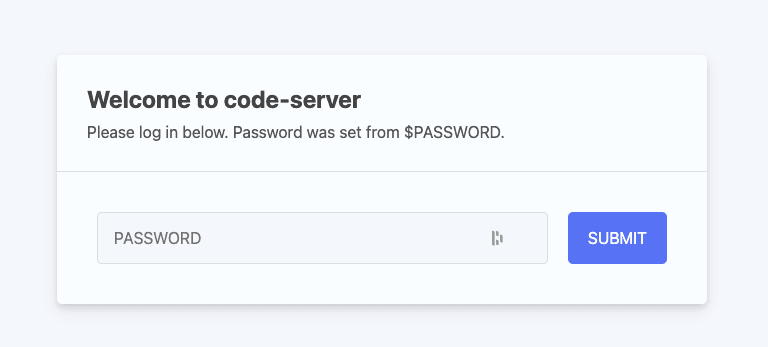
2. Access the Web UI
Open a browser and navigate to:
http://your-vps-ip
Replace your-vps-ip with the actual IP address of your VPS.
- Copy the login credentials for code-server
Access the VS Code Server Web UI:
- In your web browser go to http://your-vps-ip and login using the password copied in the previous step.
You are now running VS Code in your browser.
3. Secure Your Domain with Let's Encrypt
To enable HTTPS, first point your domain's DNS A record to your VPS IP, then run Certbot:
bashsudo certbot --nginx -d your-domain.com
Follow the prompts to configure your domain and enable HTTPS. Certbot will set up automatic renewal.
To verify auto-renewal is working:
bashsudo certbot renew --dry-run
4. Configure Nginx for Custom Domain
Create a new Nginx server block:
bashsudo nano /etc/nginx/sites-available/code-server
Add the following configuration (adjust the domain):
bashserver { listen 80; server_name your-domain.com; location / { proxy_pass http://localhost:8080; proxy_set_header Host $host; proxy_set_header Upgrade $http_upgrade; proxy_set_header Connection upgrade; proxy_set_header Accept-Encoding gzip; } }
Enable the configuration and reload Nginx:
bashsudo ln -s /etc/nginx/sites-available/code-server /etc/nginx/sites-enabled sudo nginx -t sudo systemctl restart nginx
5. Access VS Code Server via HTTPS
After completing the SSL setup, open your browser and navigate to:
https://your-domain.com
Log in with the password set earlier. You are now using code-server over a secure HTTPS connection.
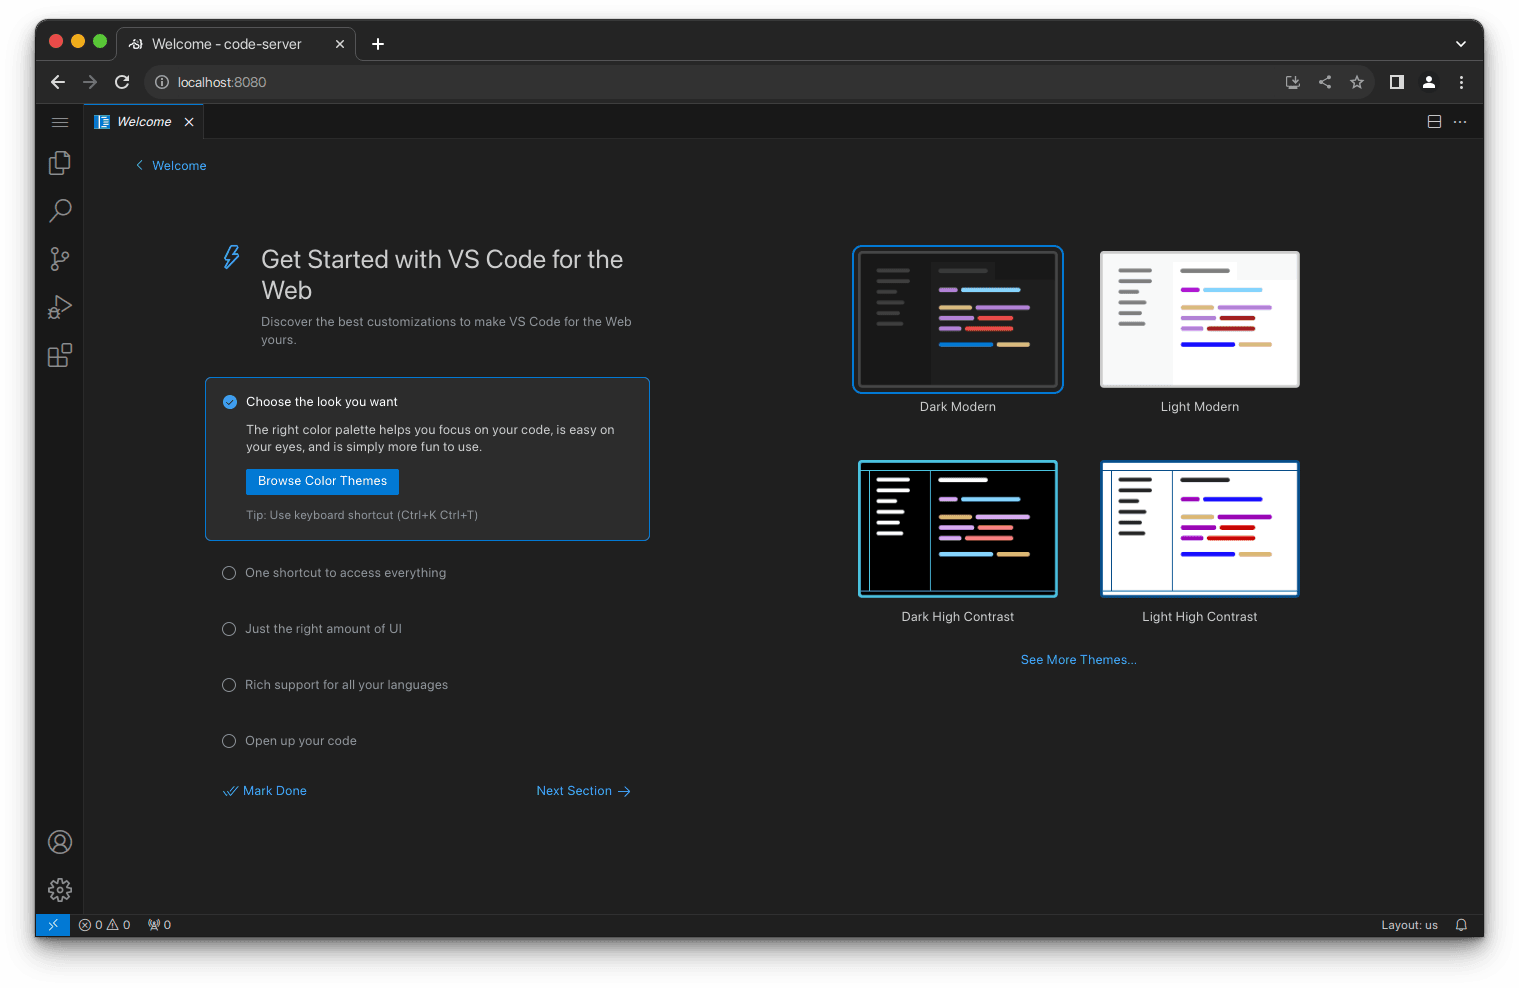
Using the Interface
The left-hand Activity Bar provides quick access to the most commonly used features:
- Explorer — browse and manage your project files and folders
- Search — find and replace across your workspace
- Source Control — Git integration for committing and branching
- Run and Debug — built-in debugger with Node.js support and extension support for other languages
- Extensions — install extensions from the VS Code Marketplace
Open a terminal at any time via the Terminal menu or by pressing the keyboard shortcut shown in the menu. The terminal opens in the lower panel, with its working directory set to your workspace root.
Important Paths
- code-server config:
~/.config/code-server/config.yaml - Workspace directory:
/var/lib/code-server - Nginx config:
/etc/nginx/sites-available/code-server
Support Details
- Supported By: Coder
- Support URL: https://coder.com/contact
- Support Email: contact@coder.com
Resources
- GitHub: https://github.com/coder/code-server
- Documentation: https://coder.com/docs/code-server/latest/guide
- FAQ: https://coder.com/docs/code-server/latest/FAQ
- Visual Studio Code: https://code.visualstudio.com/